
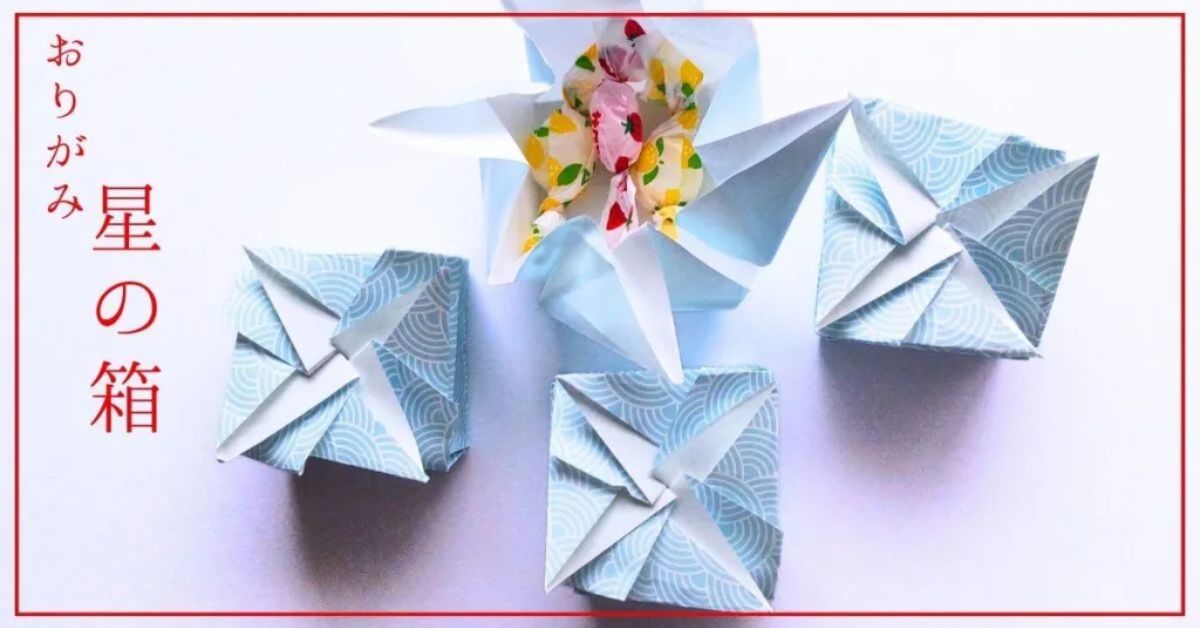
Here’s a guide on how to fold a cross-shaped box.
I discovered that there’s a box that matches the cross-shaped envelope, and I wanted to make one, so I searched high and low.
But I couldn’t find any instructions on how to fold it.
I gave up, thinking there was no other way, but after a while, I started worrying that I really wanted to try folding it after all.
So, I decided to try folding it myself.
After all, this box actually exists.
I figured if I tried hard enough, I could probably fold it.
It wasn’t easy, though.
I managed to pull it off, but I wonder if there isn’t a slightly simpler way to fold it.
There are a lot of folds, so it might be a little confusing.
Still, I’d be happy if you enjoy this origami project.
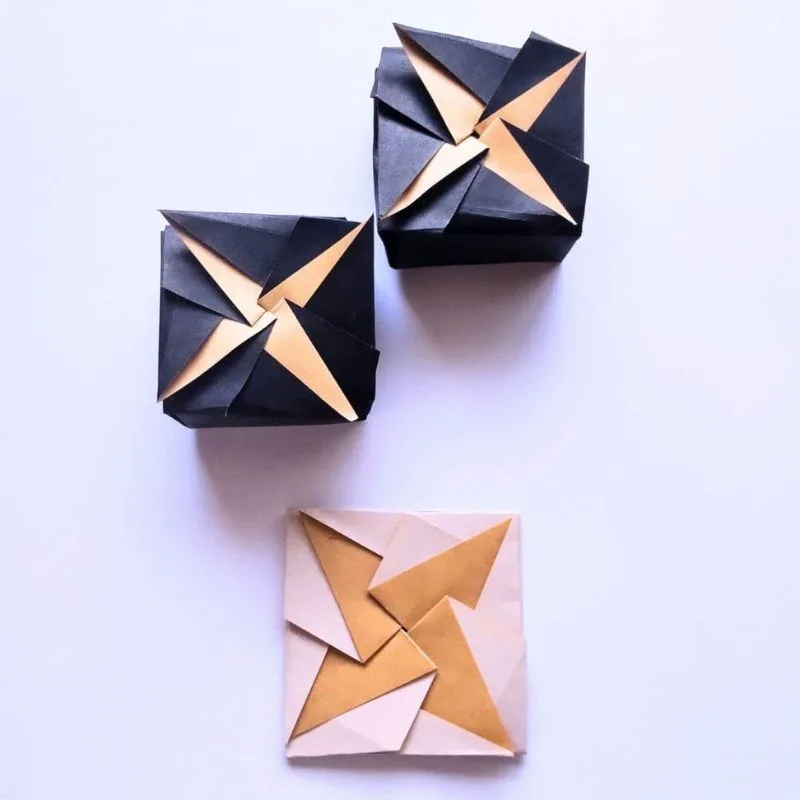
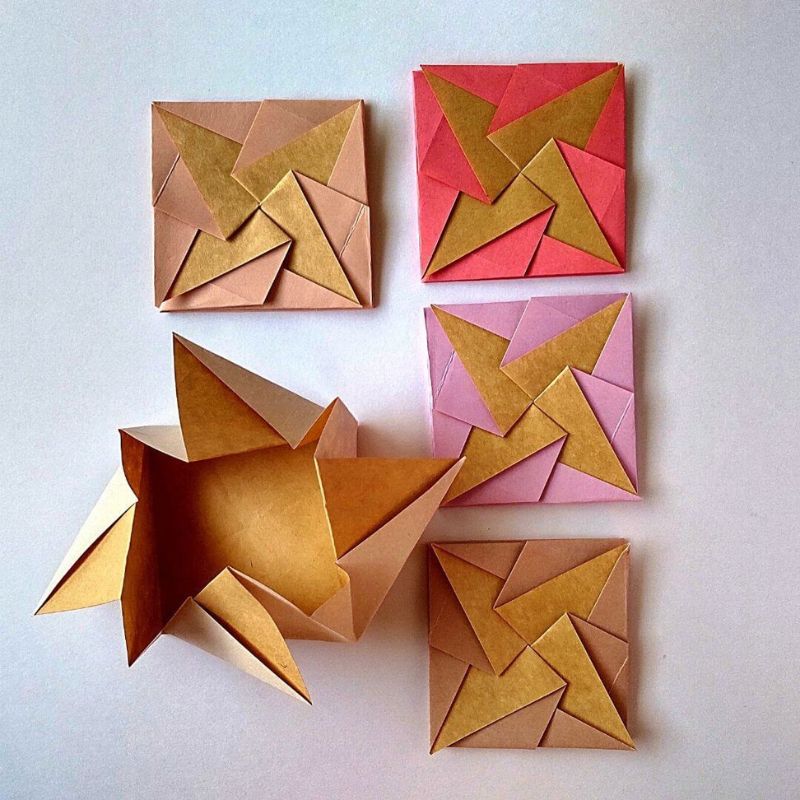
The box on top has a cross on it,
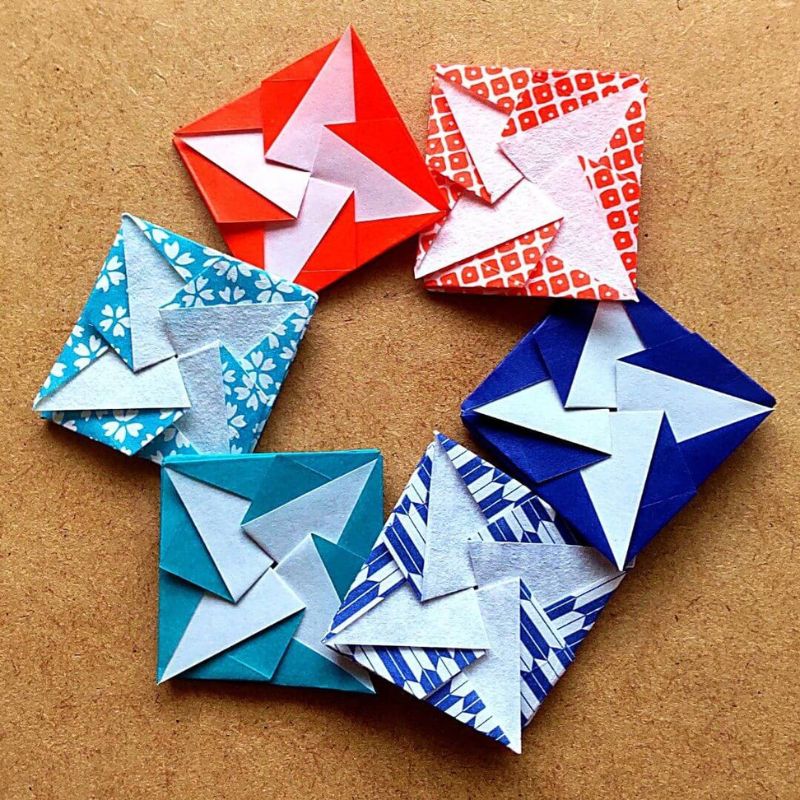
and the white one below is an envelope with a cross on it.
Folding Instructions
Make a crease
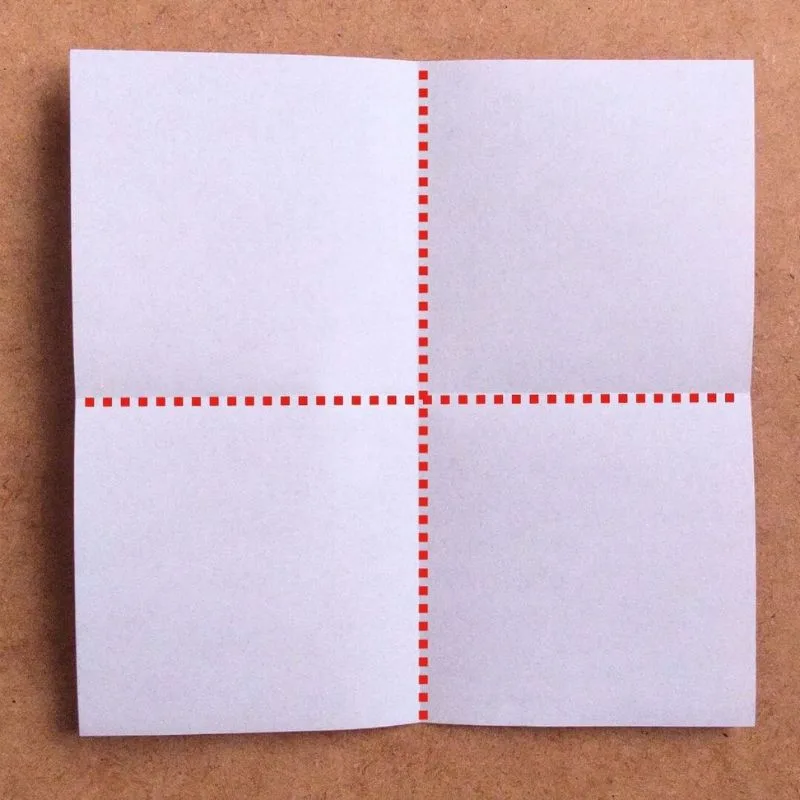
First, fold it into a square.
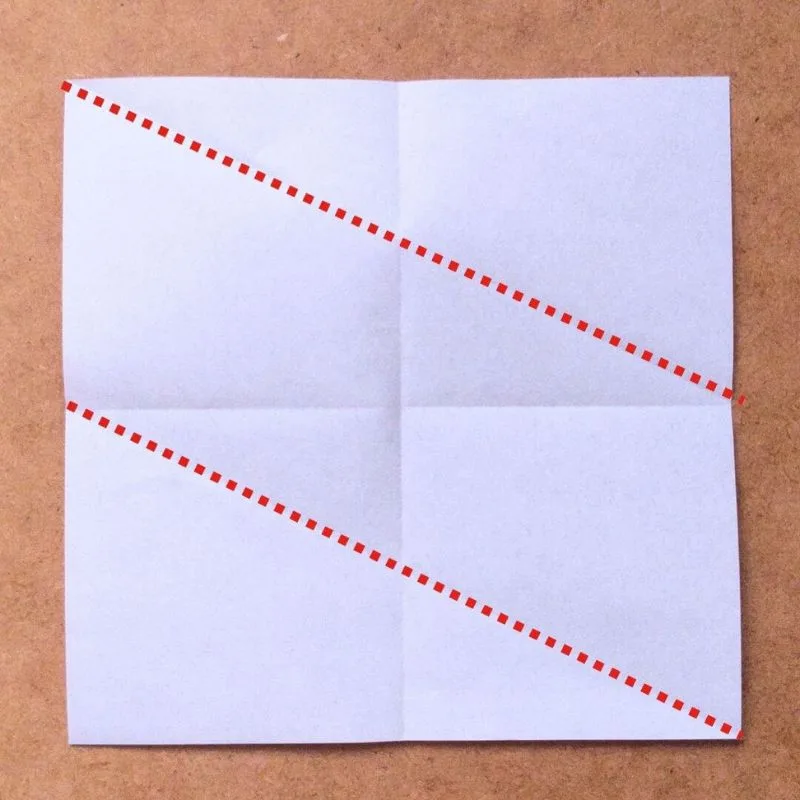
Next, connect the corner to the center mark to create a crease.
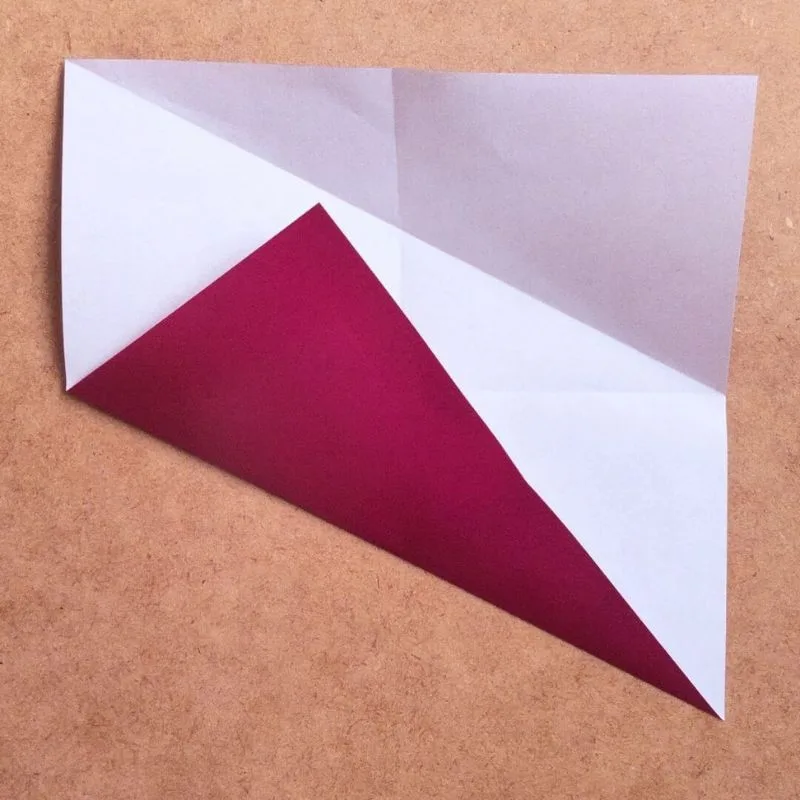
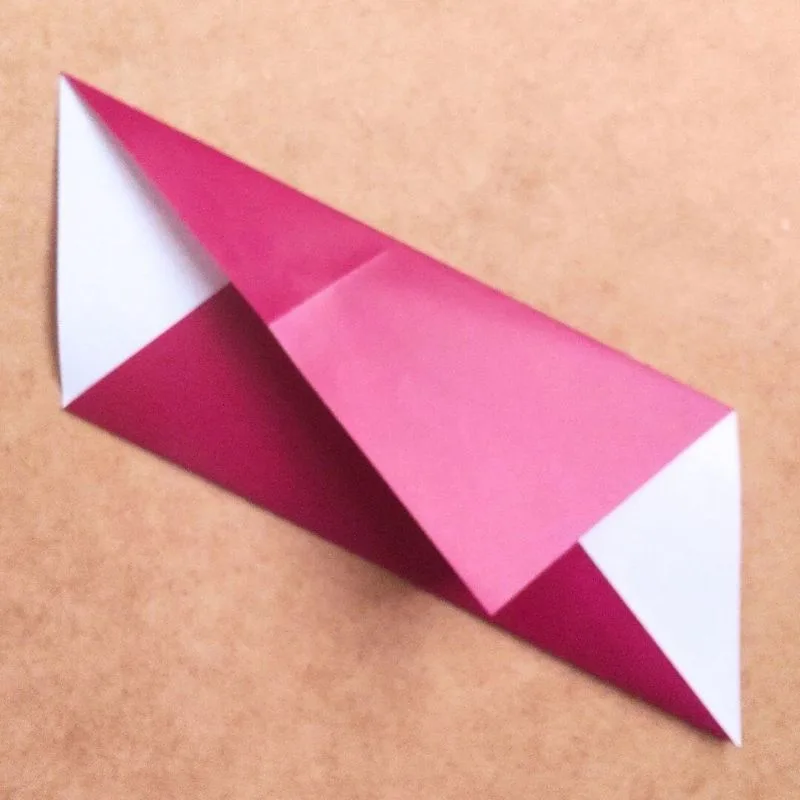
Make a crease from the top right as well.

Turn it over and fold the top triangle toward the back.
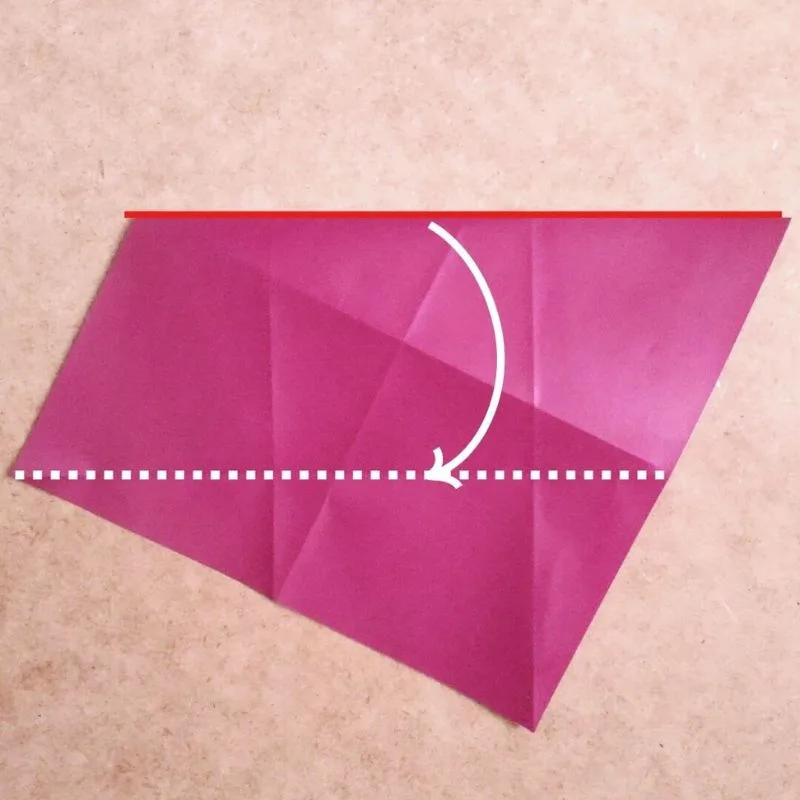
Then, fold along the dotted line.
Do not fold the triangle you just made.
Open this triangle downward.
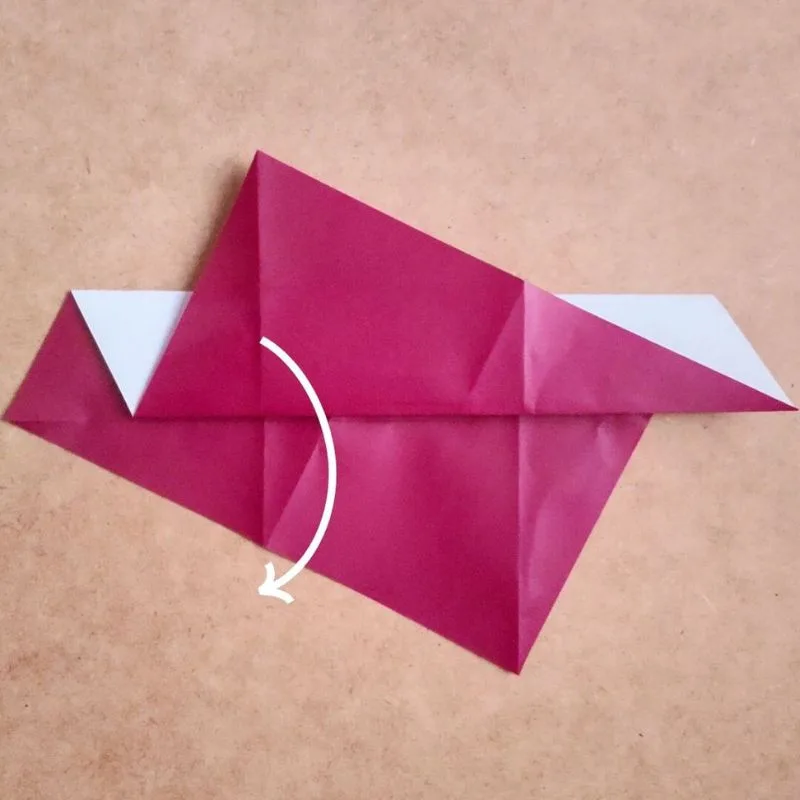
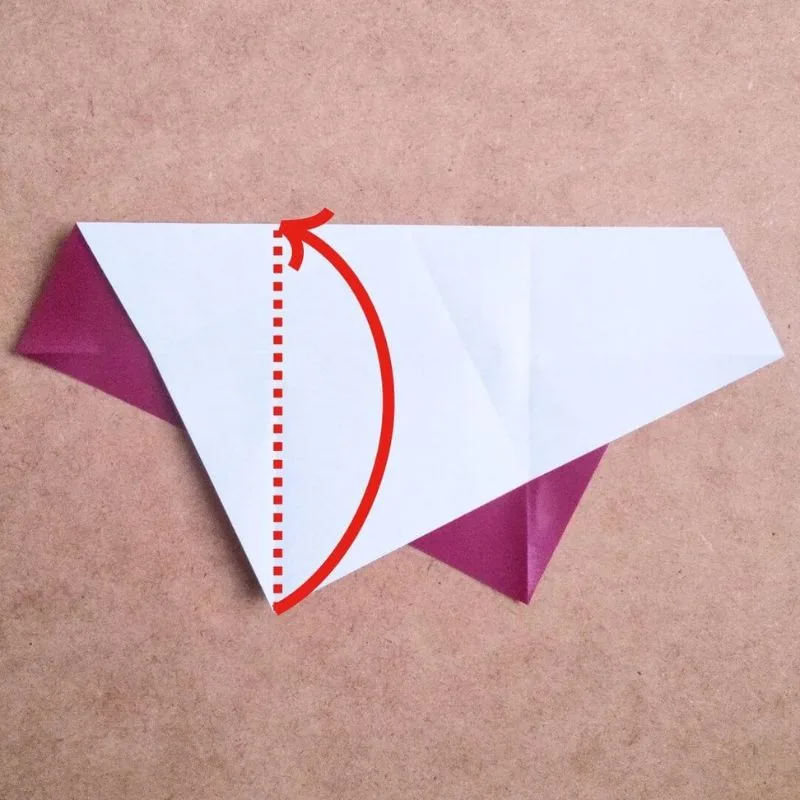
Next, fold the bottom corner along the edge.
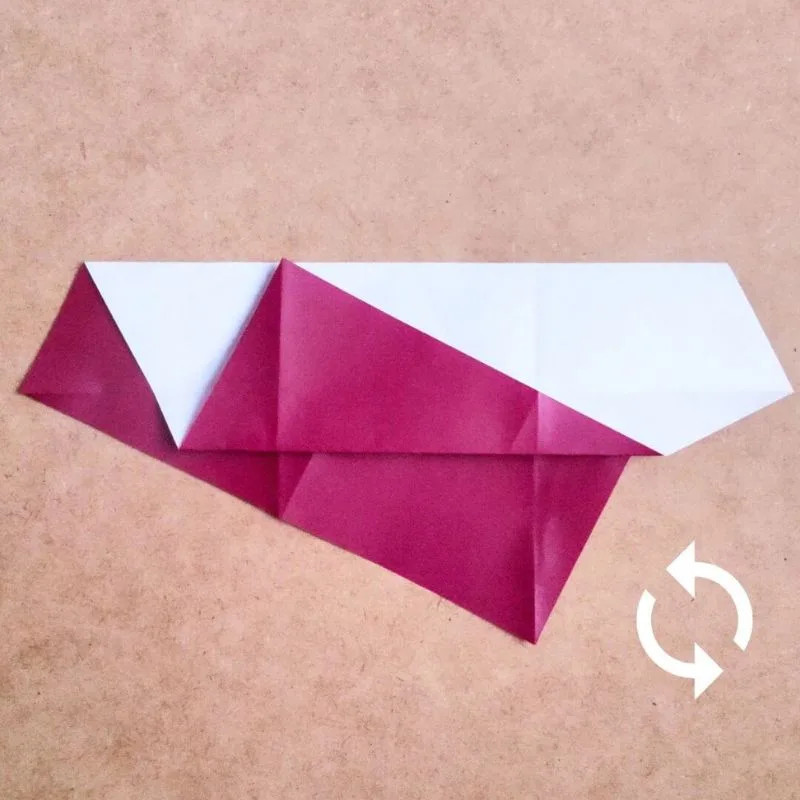
Flip it over and fold the other side in the sOnce you’ve folded both sides, fold the edges toward the center.
Again, do not crease the paper into a triangle at this stage.
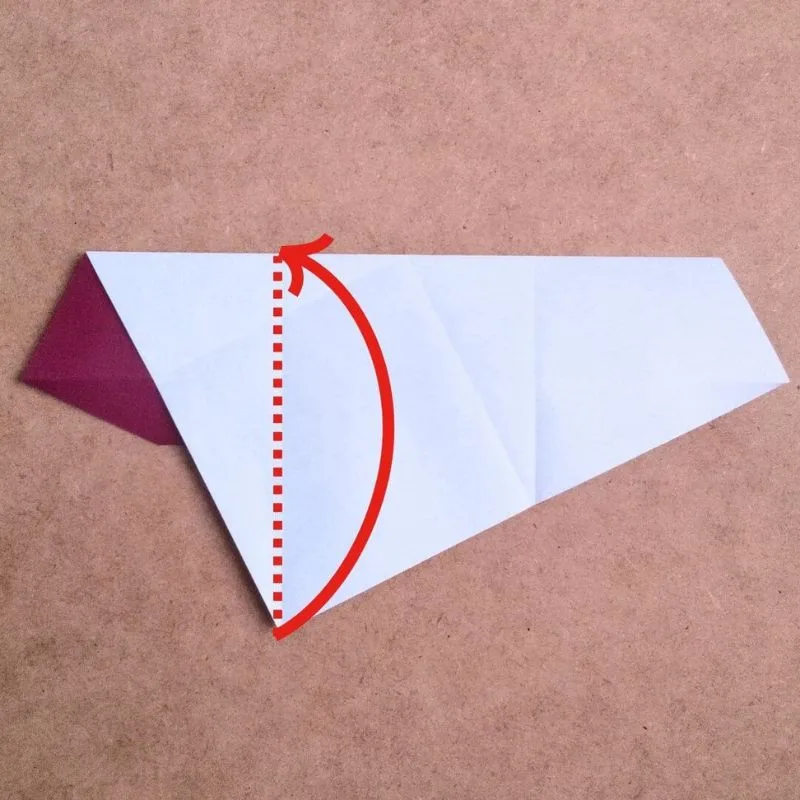
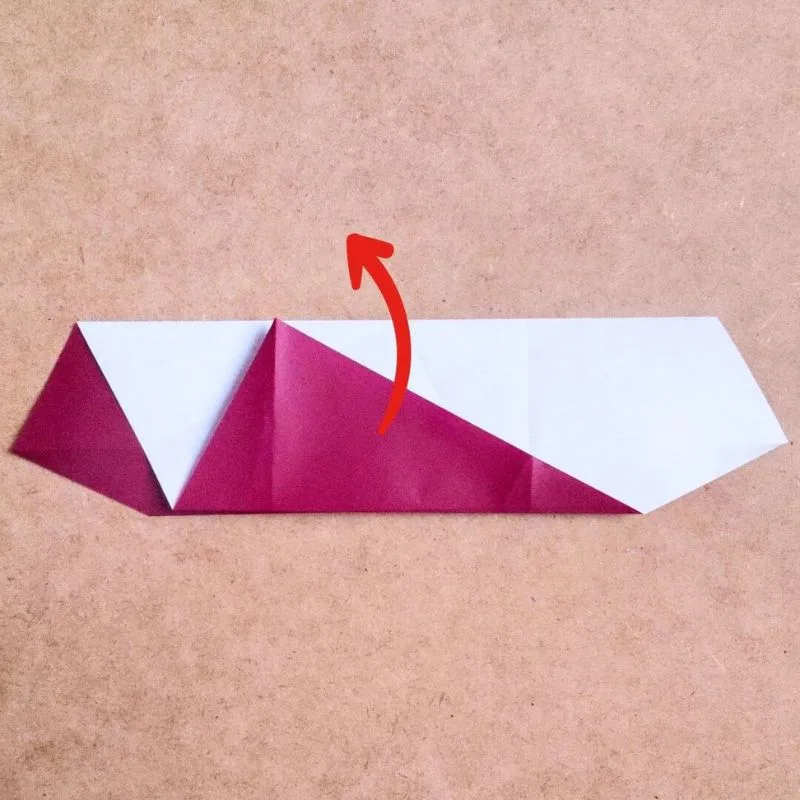
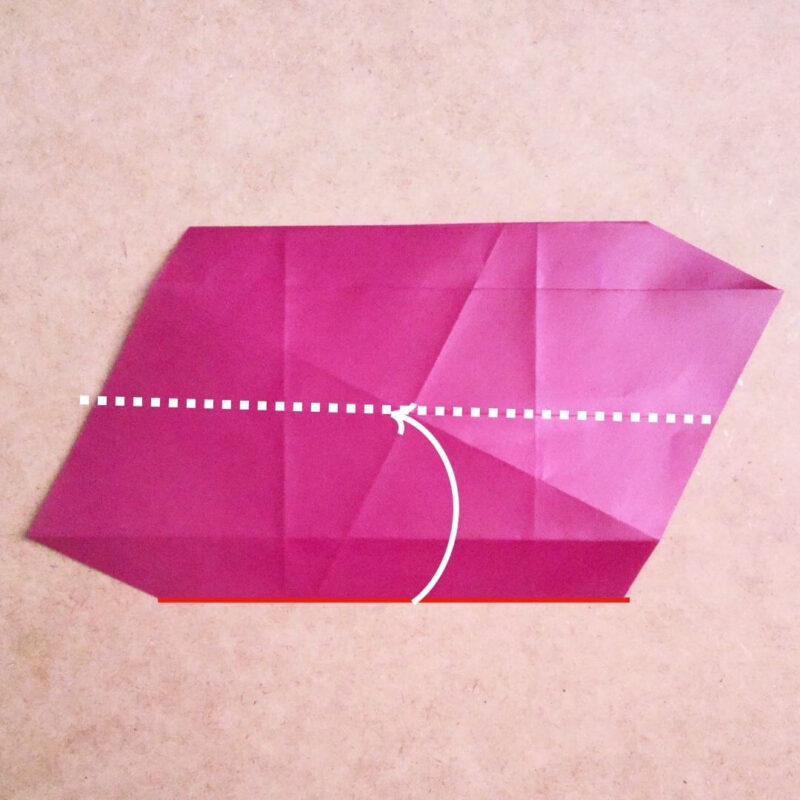
Once you’ve folded both sides, fold the edges toward the center.
Again, do not crease the paper into a triangle at this stage.
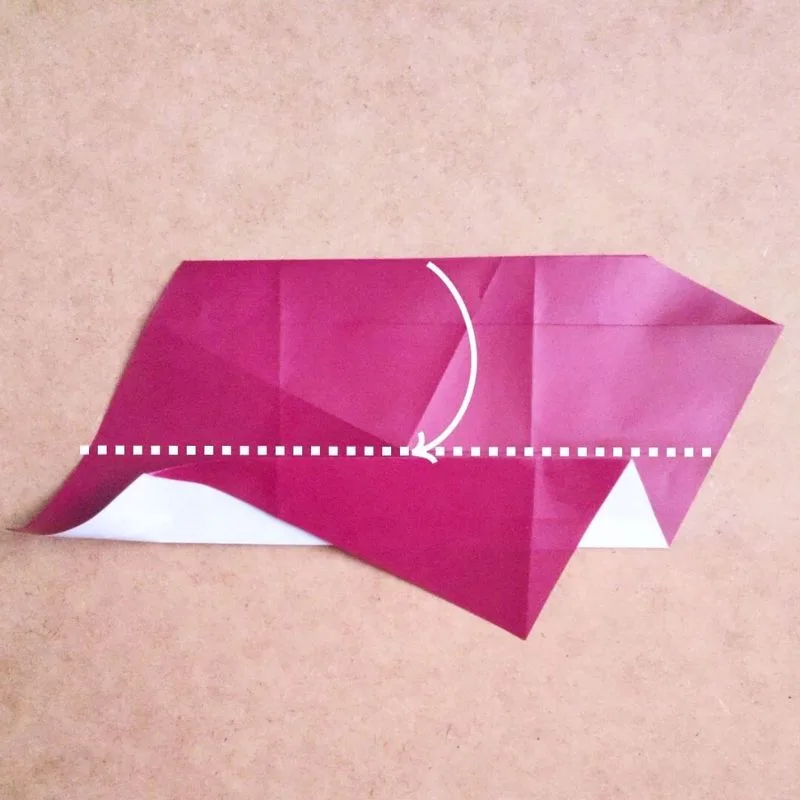
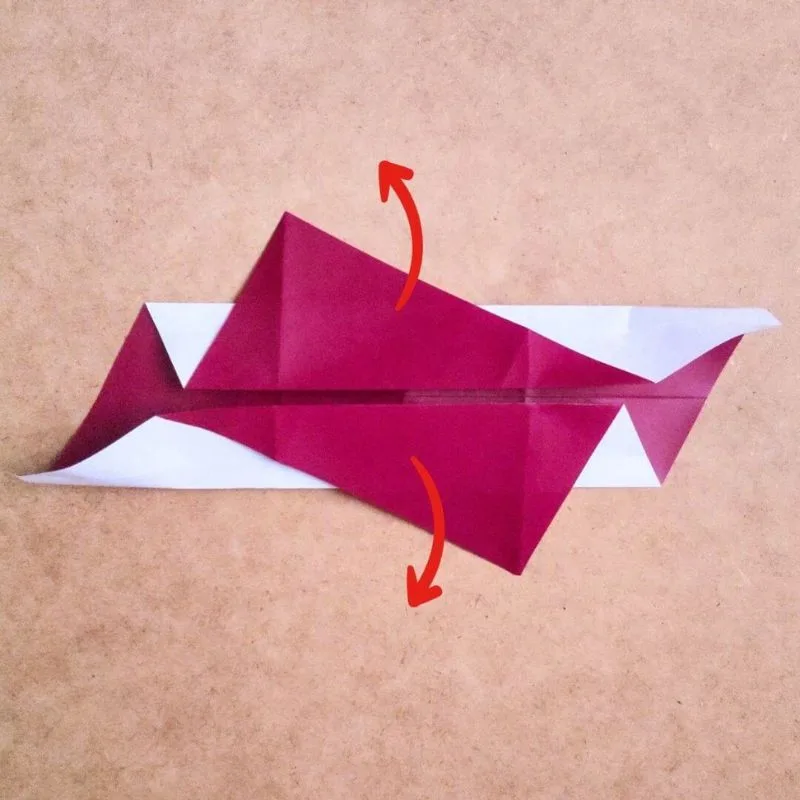
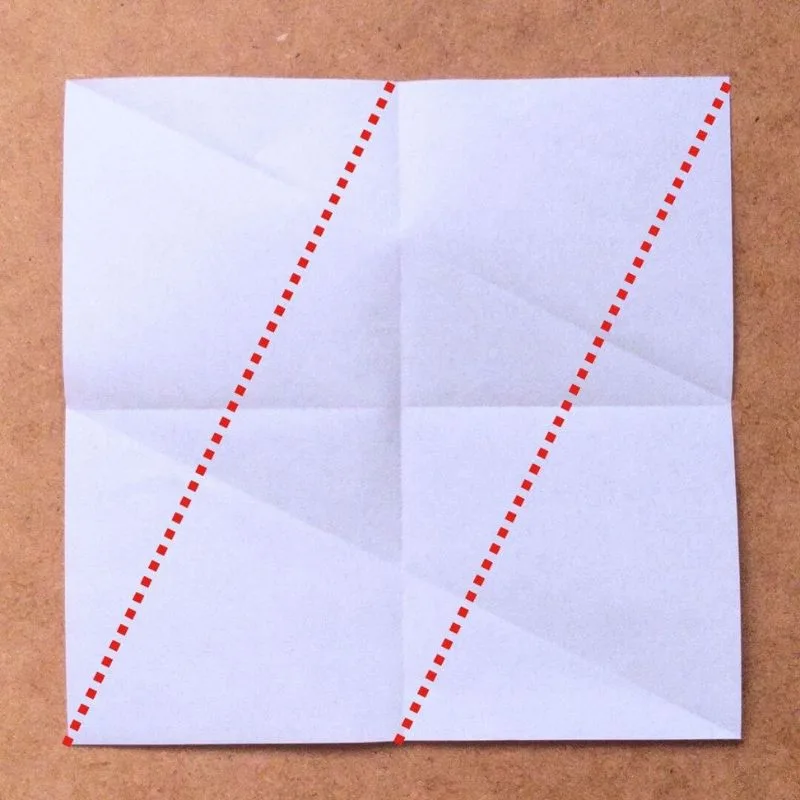
Make the same fold vertically as well.
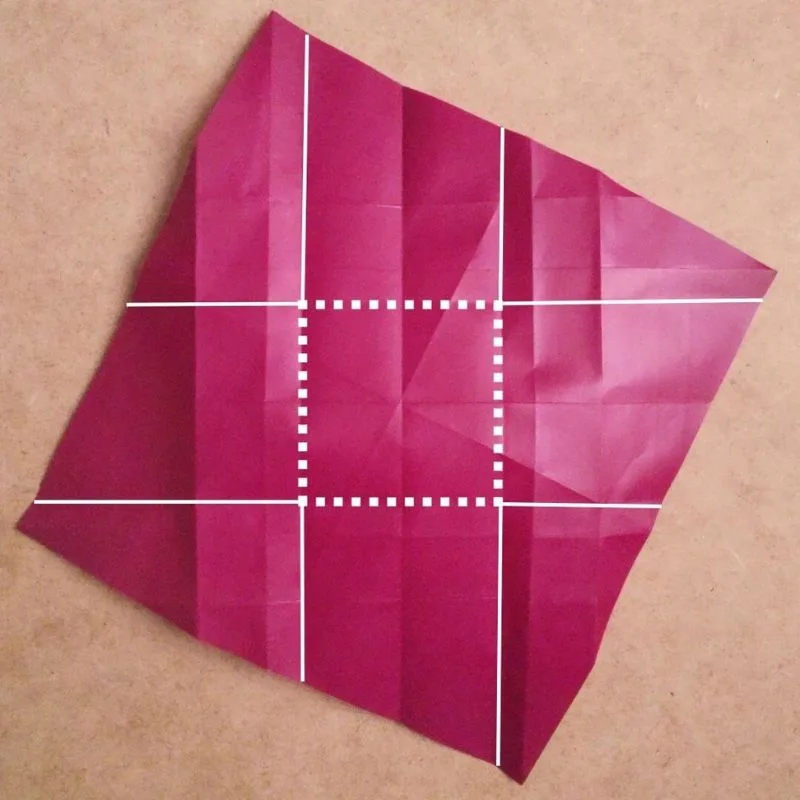
The dotted square represents the bottom of the box.
The white lines represent the corners of the box.
Make a cross-shaped fold
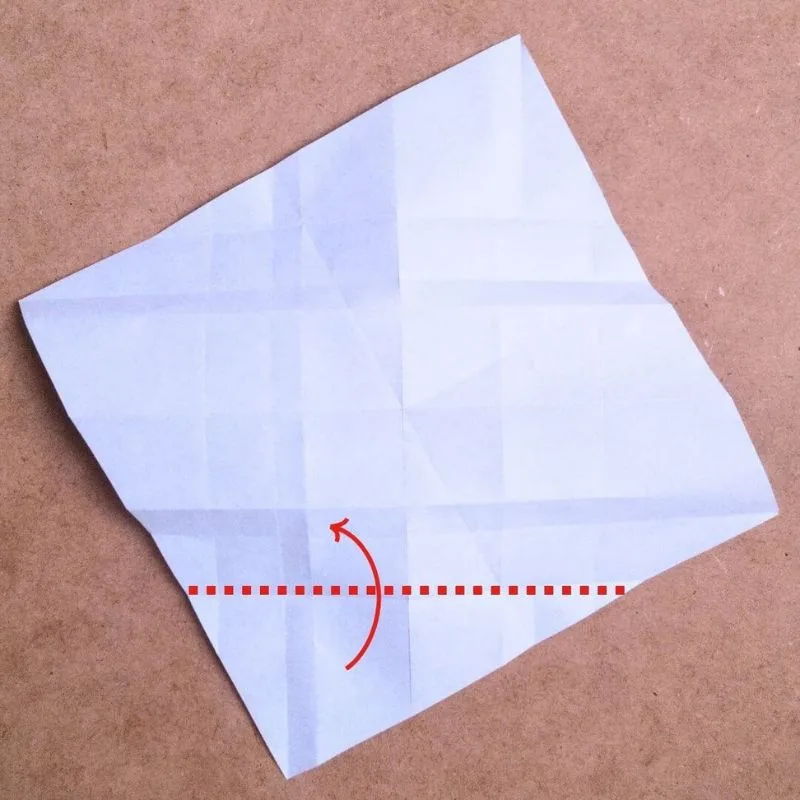
Turn it over, then fold the triangle along the bottom line.
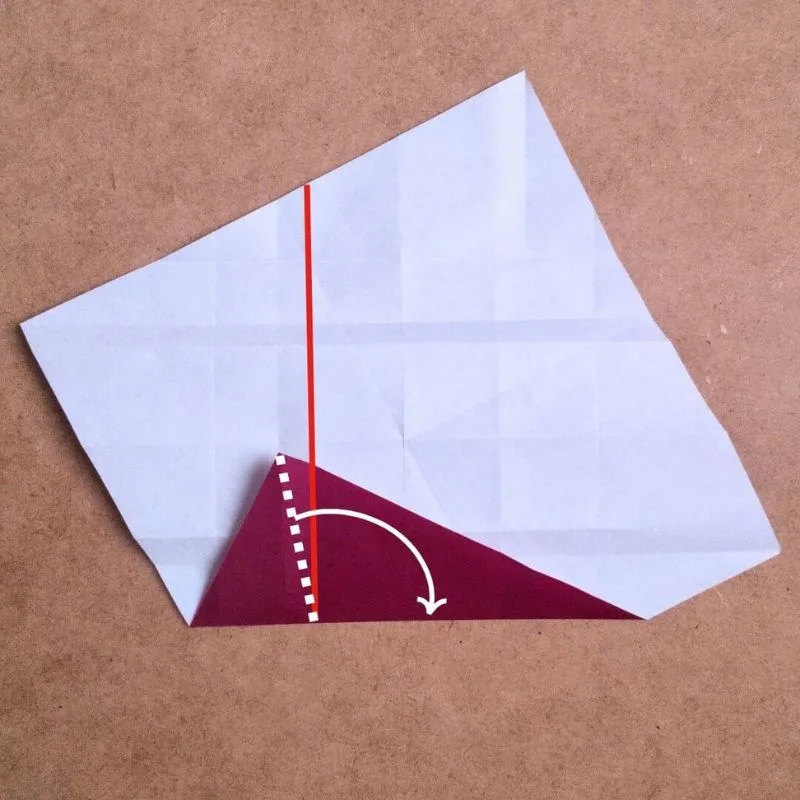
Fold along the line connecting the corner of the origami paper to the corner of the box.
Fold it so that it aligns with the base of the triangle.
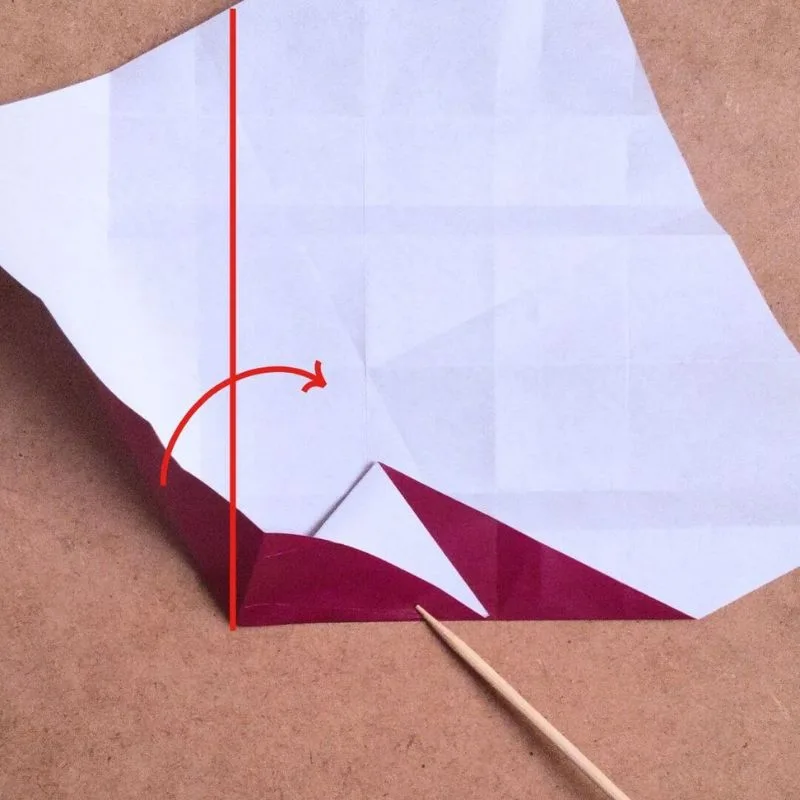
Then, fold along the line at the bottom of the box, making sure the triangle doesn’t extend beyond the edge.
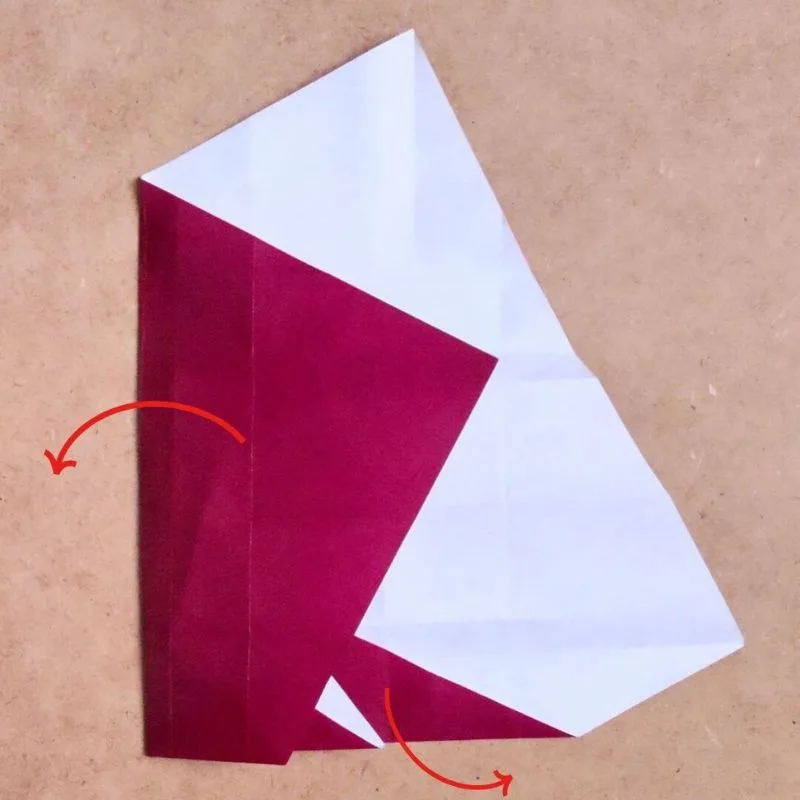
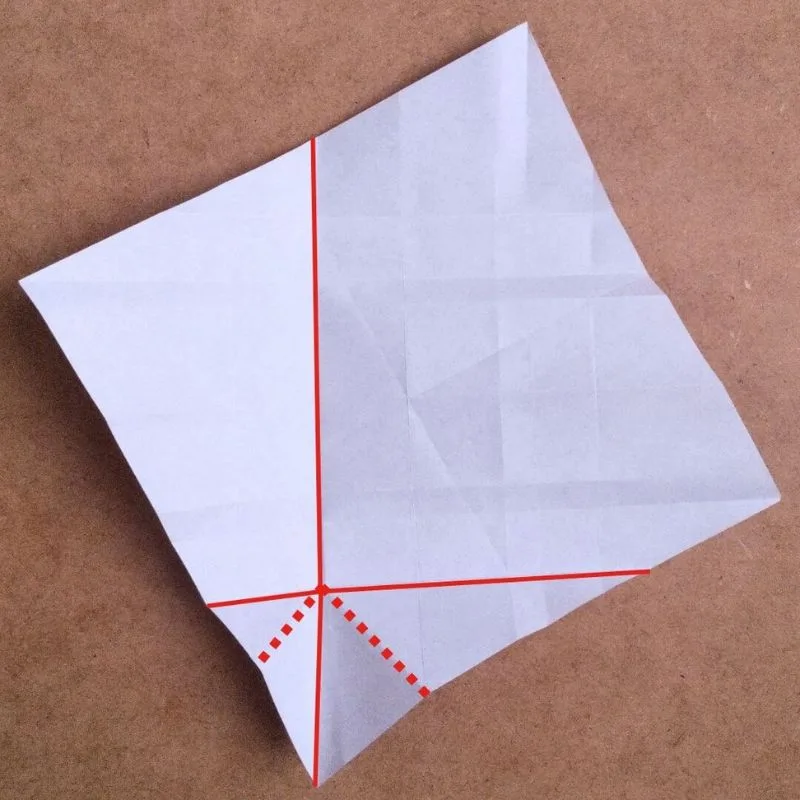
Make this fold on the remaining corners as well.
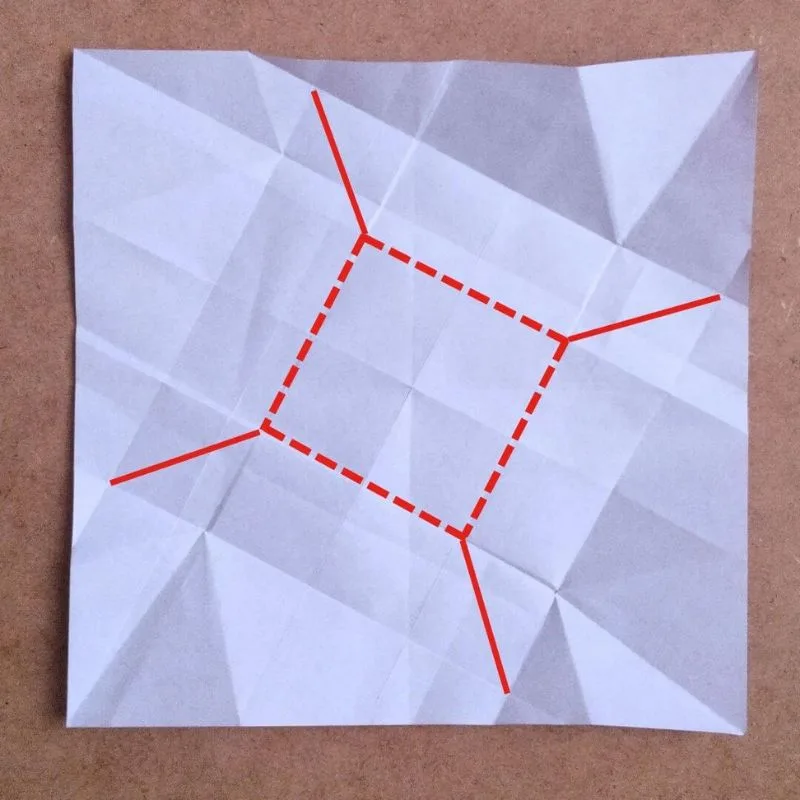
Fold the line that forms the corner of the box upward.
Let’s shape it into a box
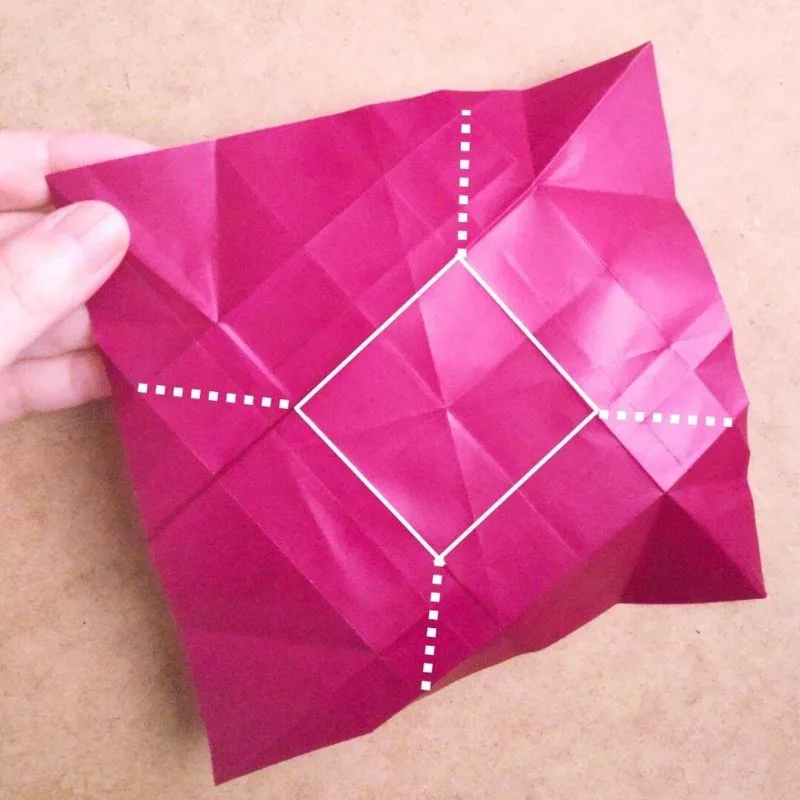
First, fold the base box.
Fold the corners of the box you just folded.
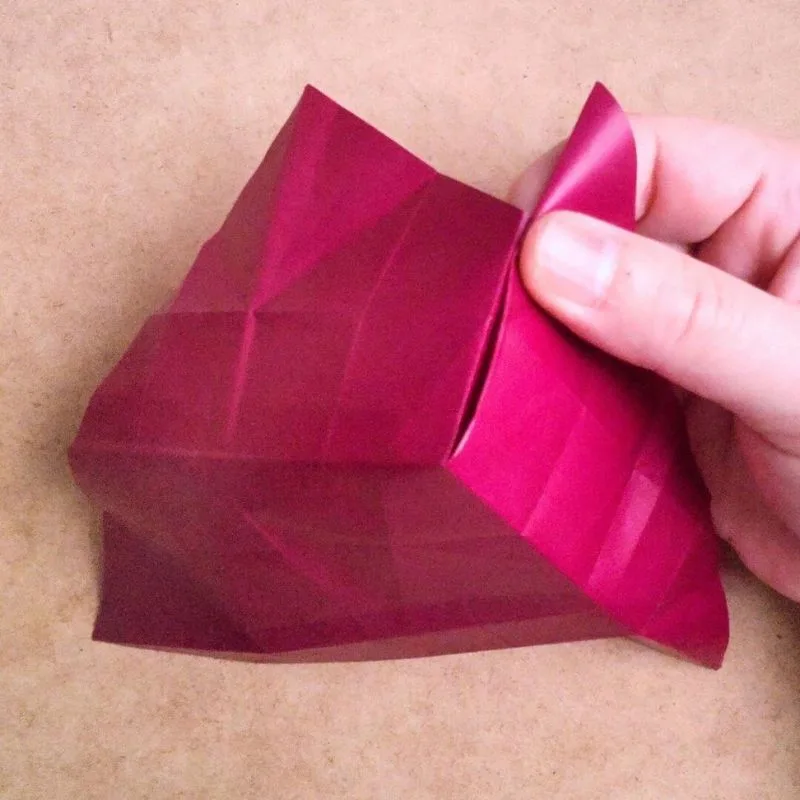
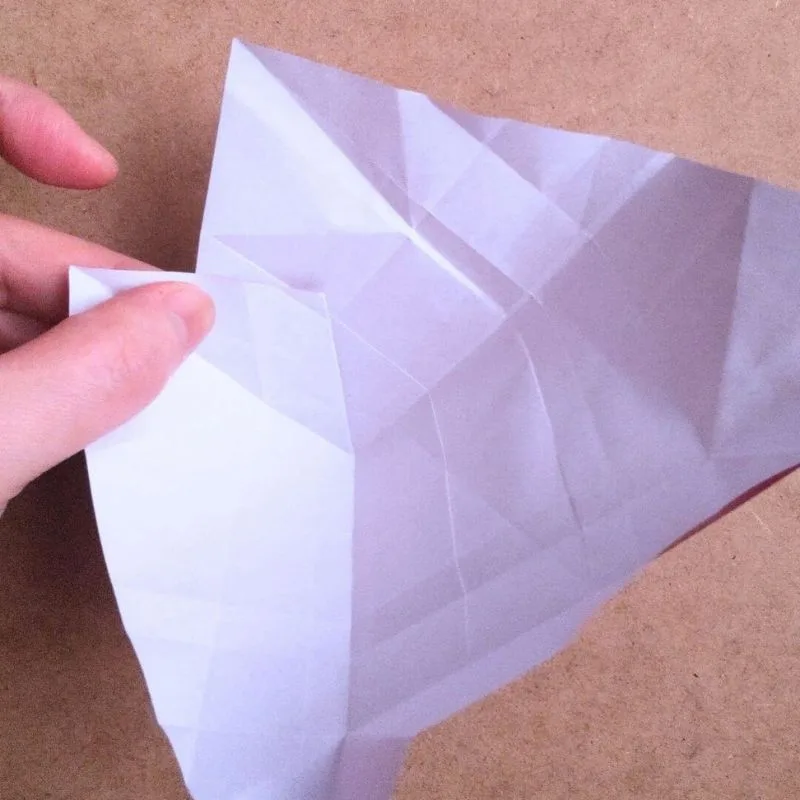
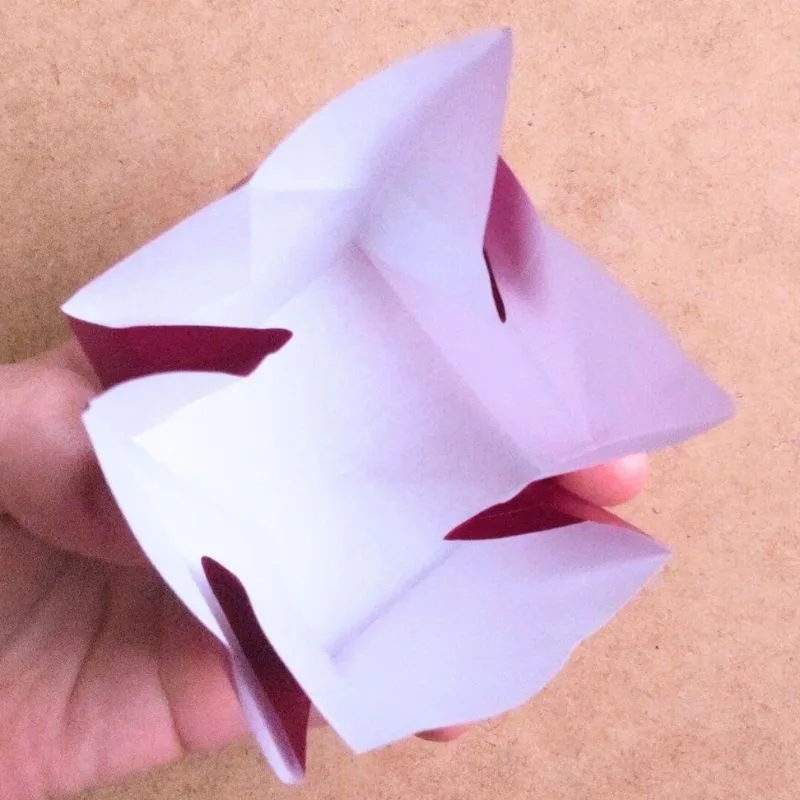
I’ve just folded the corners of the box.
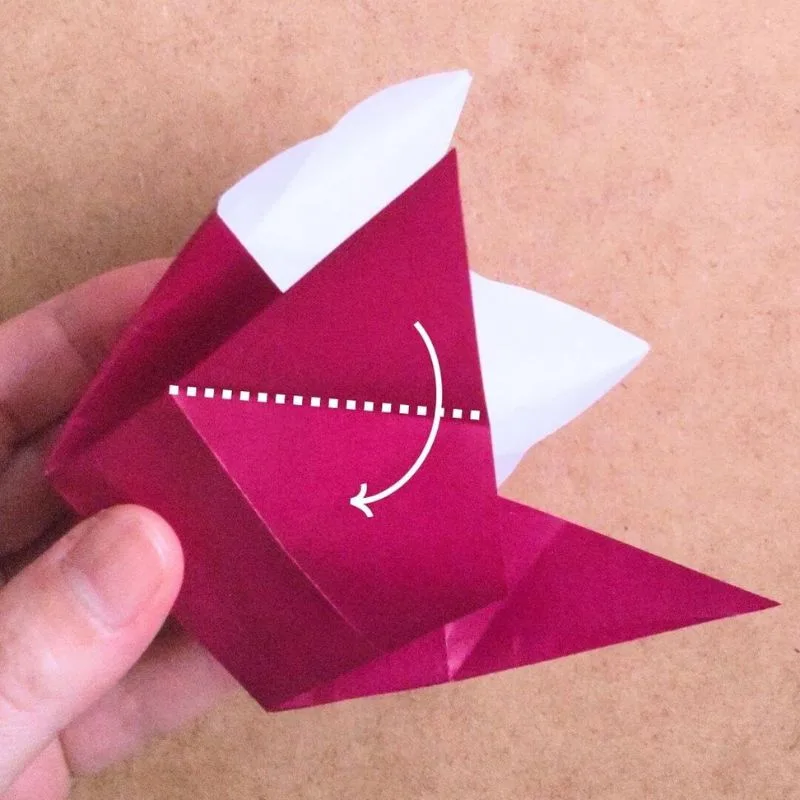
Here is a side view.
Fold the pointed corners along the creases.
Then, align the next small corner so that it overlaps the previous one.
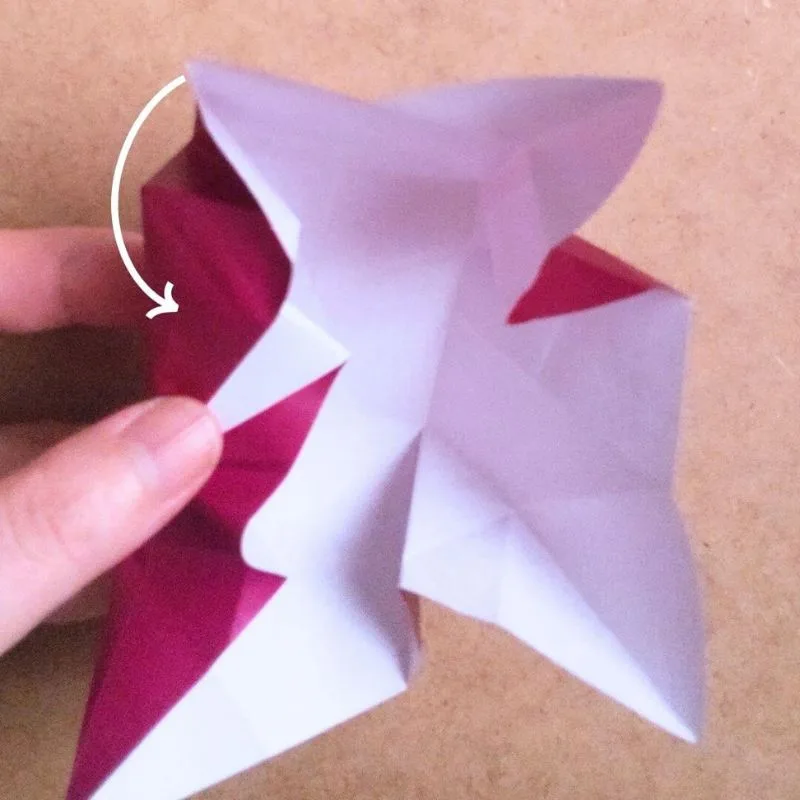
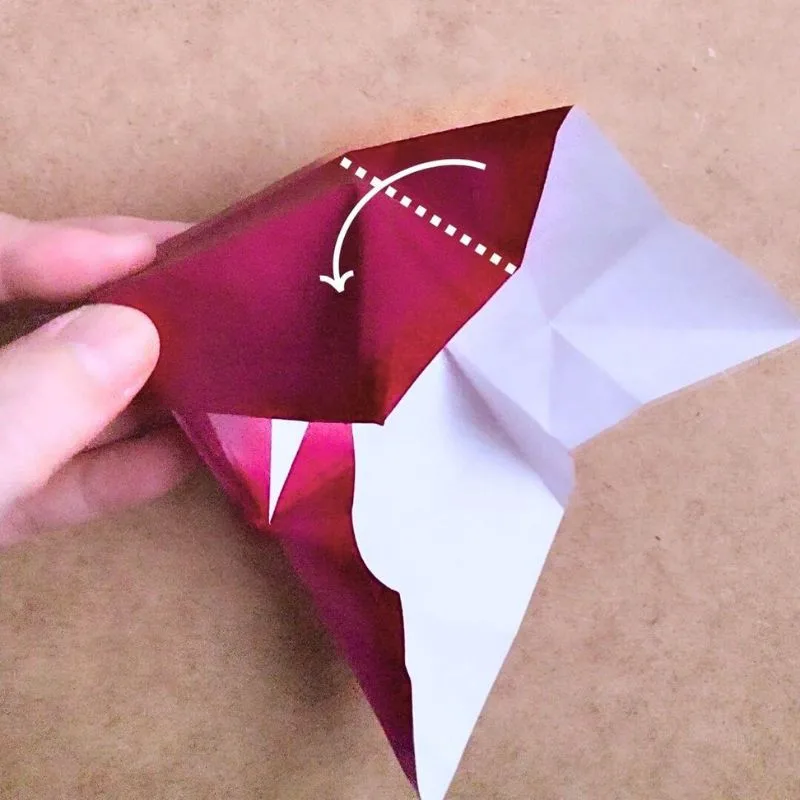
Then fold the next pointed corner, followed by the small corner, and repeat this process.
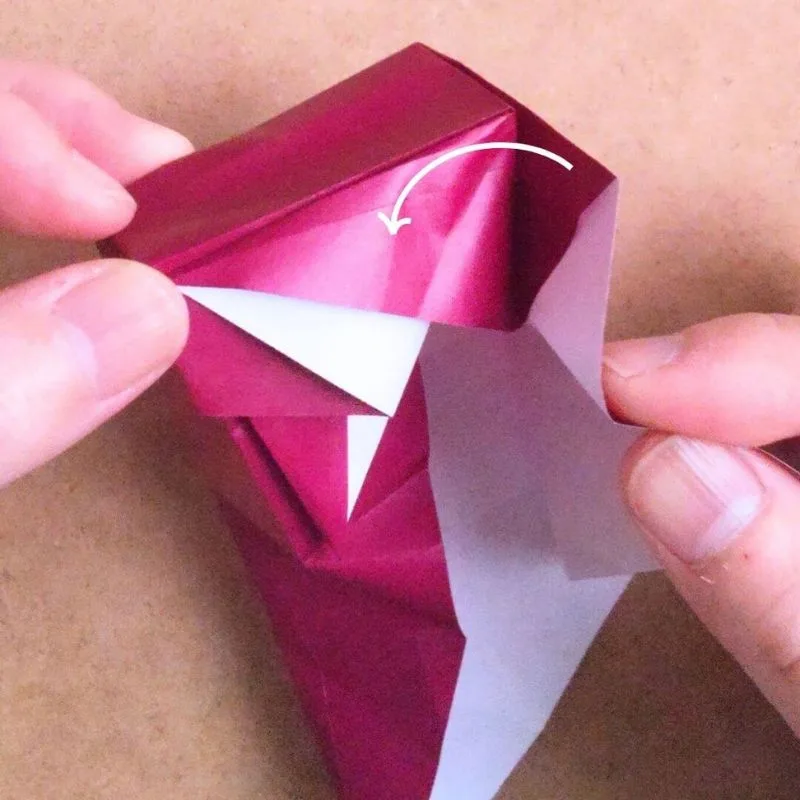
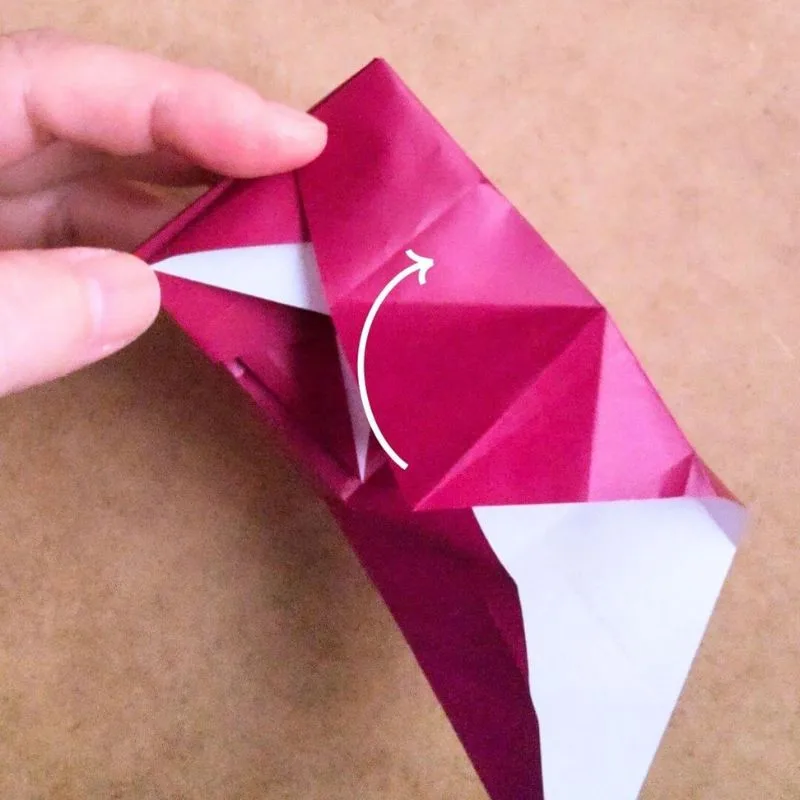
I’ve just folded the third corner.
Fold the fourth corner in the same way, but attach it to the first corner.
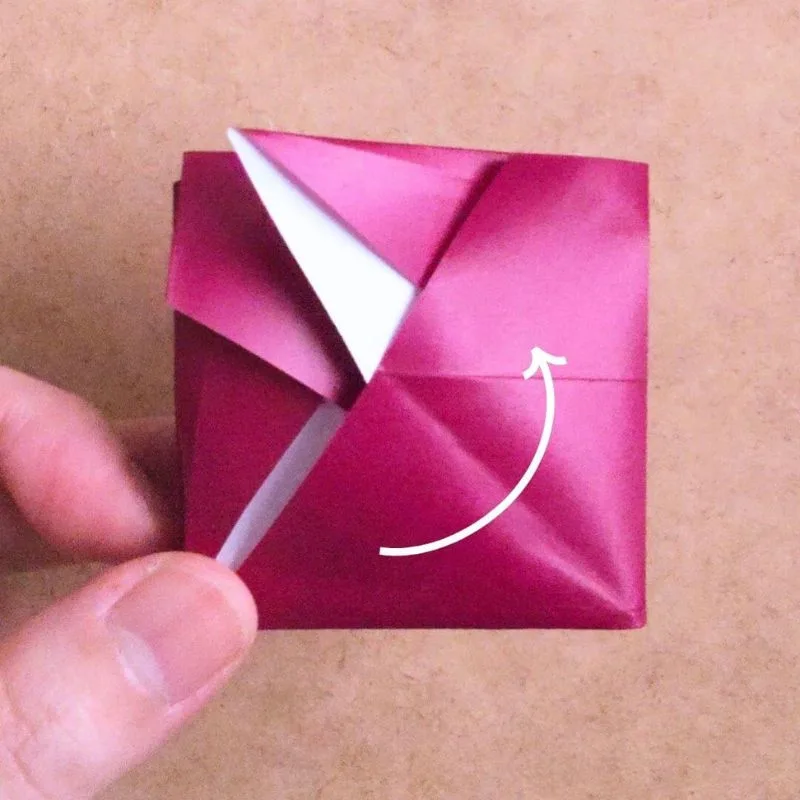
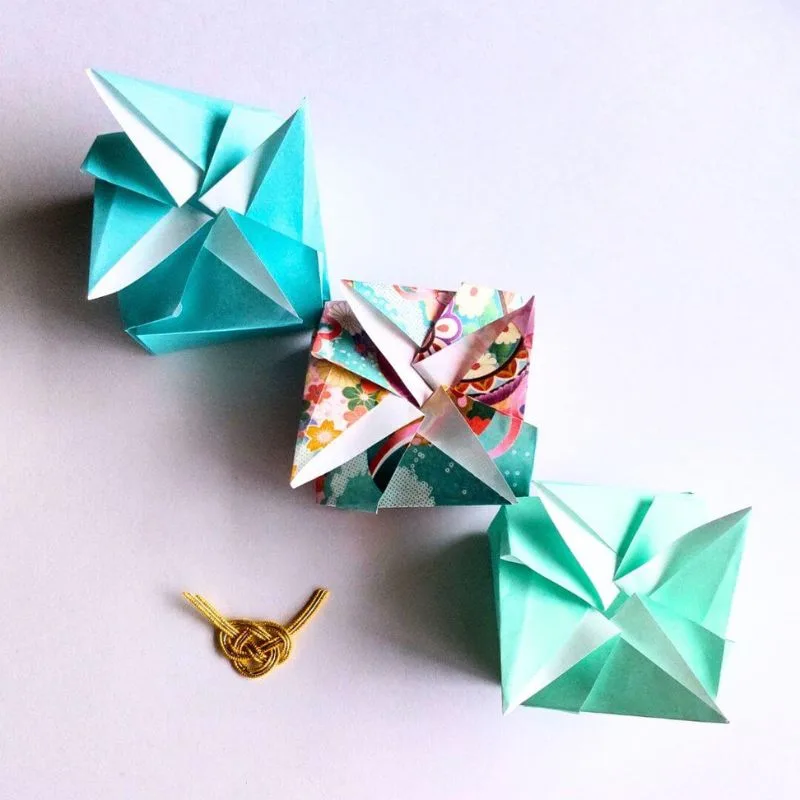
Here is the finished cross-shaped box.
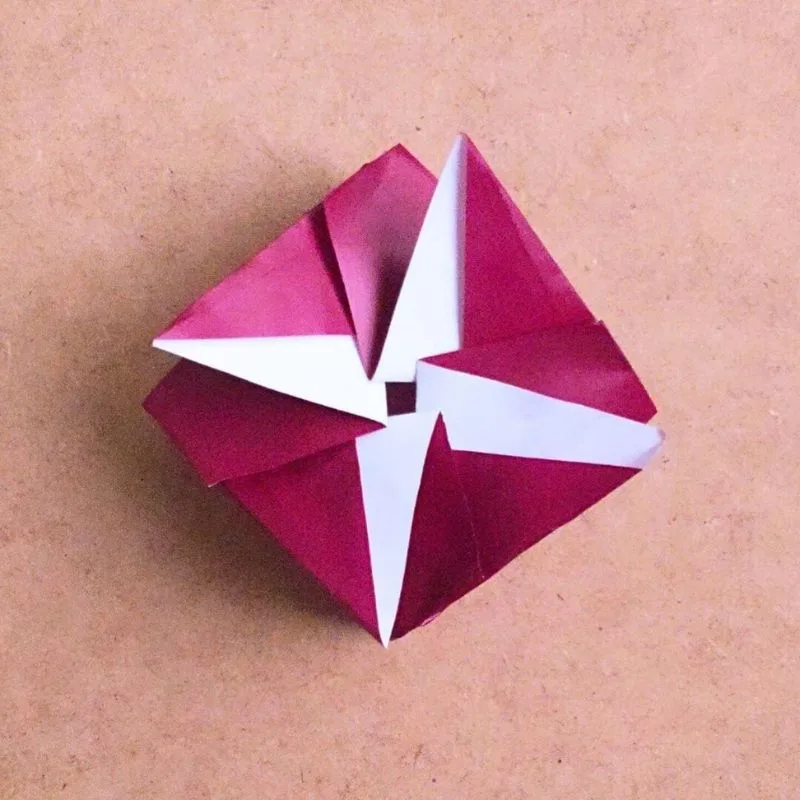
Test fold
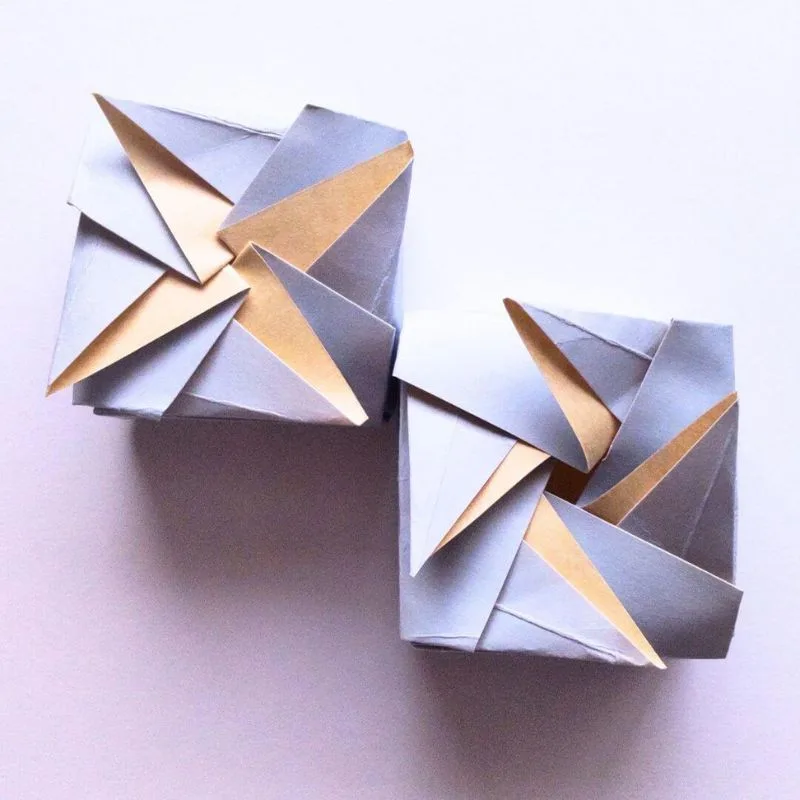
The box on the left was folded using the method I described.
The box on the right was made before I learned that folding technique.
There’s a hole in the center, so you can see inside.
I thought it might be okay as is, but I decided to put in a little more effort.
Cross-shaped envelope
Watch a video tutorial on how to fold it
On Pinterest, we show you how to fold it in a video.

In Conclusion
I hope I can find a way to reduce the number of creases.
For now, I’ll leave it at that for this trial run.
Wishing you a mindful and creative day through the art of origami.